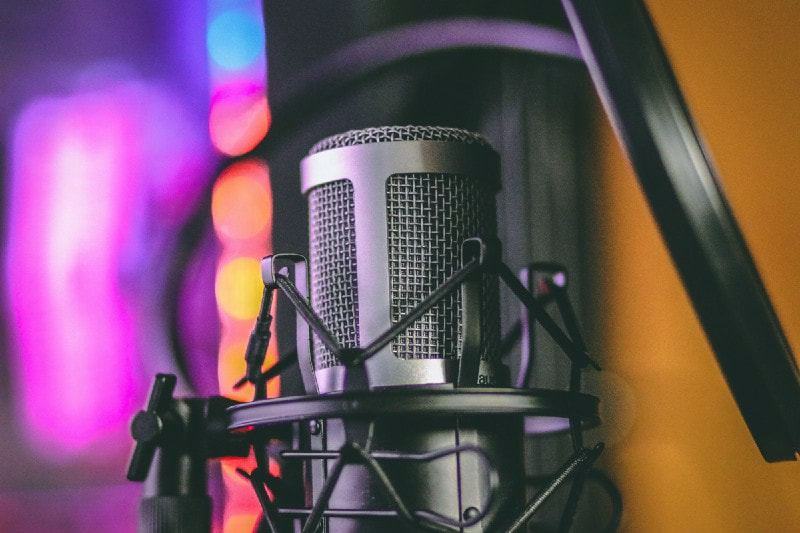
 Photo by Thomas Le on Unsplash I’ve mixed and edited hundreds (or thousands, I lost count) podcast episodes and overtime I have noticed the same issues in those recordings that could have exponentially improved the sound by just spending, not money, but a few minutes of prep time to set everything up. Forget about expensive mic or outboard preamps and limiter, all you need is a handy recorder, the tips below, and a good story. 1. Headphones is king (or earphones) This is particularly true with skype interviews as the sound coming out of your speakers can bleed to your mic. So what usually ends up is your guest gets recorded twice a millisecond apart. It creates an artificial reverberation that makes your guest sound like their inside a cavern. It’s the same thing on the other side of the skype conversation, your own sound will benefit if your guest wears his/her headphones. 2. Dampen things a bit with fabric (also, record on rooms where there’s a lot of stuff) Before recording in a room, try to check if there’s too much reverberation happening in it. Simplest way to check is to clap. If there’s a tiny bit of echo, we need to dampen that reverb a bit. For that, you can use some quilt or your fluffy duvet. Best place to put it is behind you, fluffed up in a console table or hanging on a mobile clothes rack. You’ll probably ask why. Well, sound travels from your mouth then gets picked up by a mic. A big chunk of the sound gets past that mic and bounces off from your computer, desk, or wall, and into the room until it reaches a wall behind you, ultimately bouncing again to reach your mic a few milliseconds after the sound came out of your mouth. Reverb is basically that, a delayed reflection of sound. If you have a large flat surface like a big dining table on the room, you can also try putting some thick fabric on top it. Then try the clap test again. Another thing you can do is to record in a place where there’s ton of stuff, like an office full of books, or a bedroom full of clothes in an open cabinet. Stuff tends to either diffuse or absorb sounds depending on how soft they are. Either diffusion or absorption is good just to tame those relections. So you thought those ikea shelves behind beauty vloggers are just display? 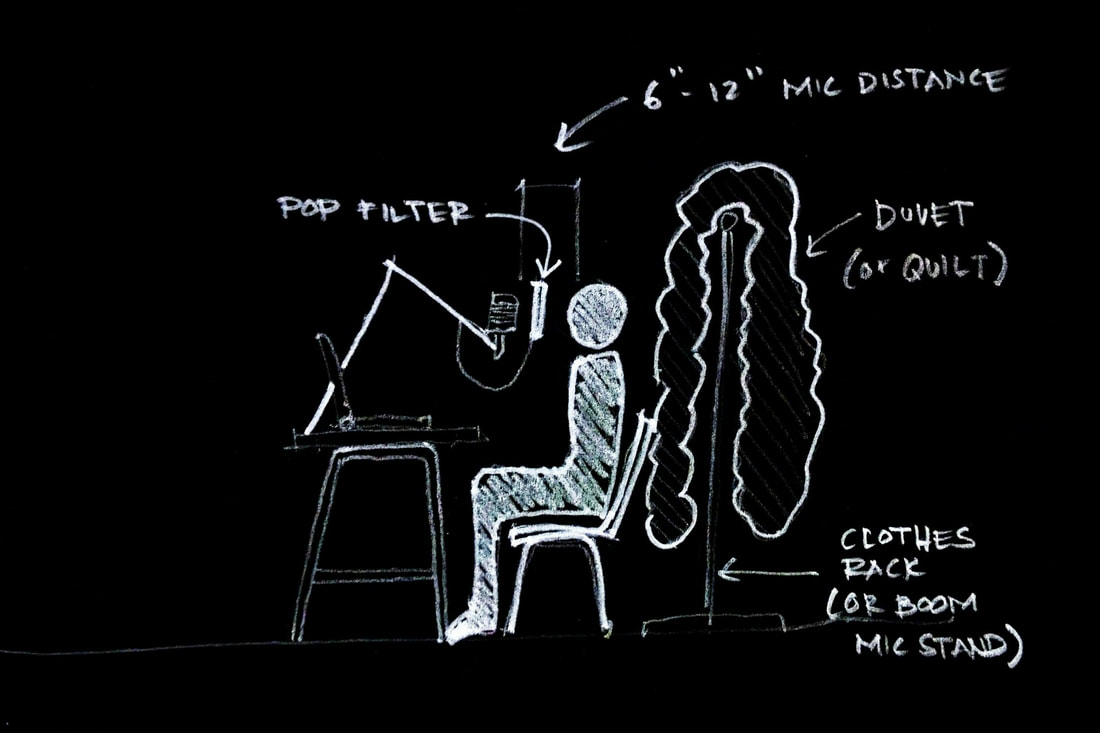 3. Keep distance from mic Most microphones tends to sound boomy when you speak too close to it. That extra bass hides the clarity and definition of your (golden) voice. Try making a test recording of different mic distance and see (hear) what you like. Mics usually sounds their best when speaking 6 to 12 inches away from it. 4. Levels (-16 dbs) This is probably the number one thing that podcasters tend to ignore. Just before you press record, do a mic test while watching the meters on your software or hardware recorder. Make sure your loudest is at around -16 dbs. If you are going above the -16 dbs marker, just dial down the gain knob on your audio interface or USB mic (not on the software recorder). There’s a lot of reasons for this, but the reason that matters most for a podcaster is to make sure you do not distort your sound by clipping when you suddenly laugh or scream. Going past 0 dbs mark will distort your sound. 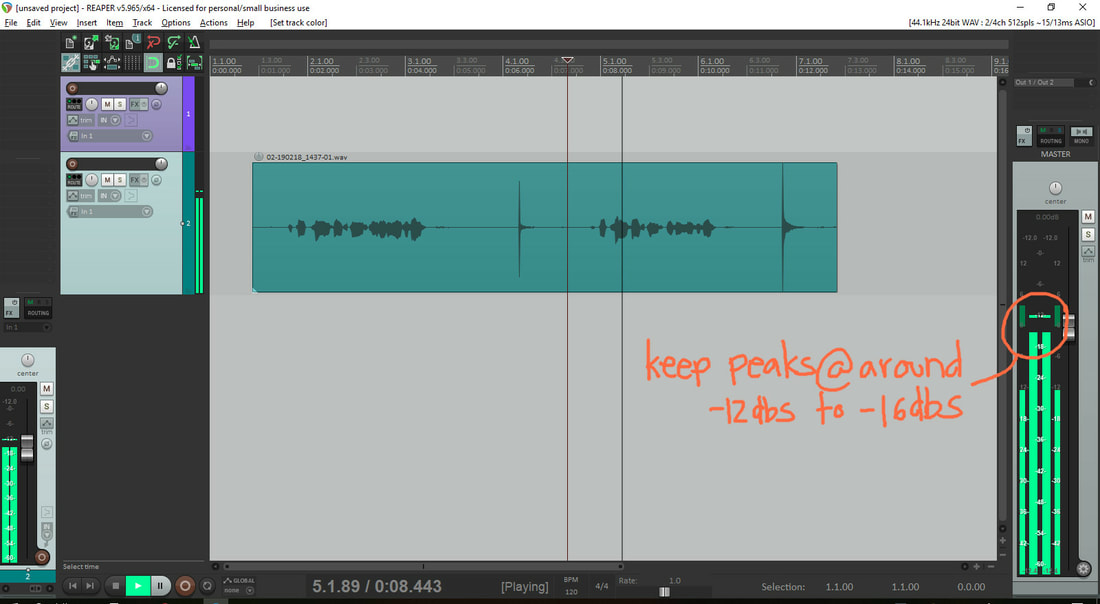 5. Record Room Noise for 30 seconds Most audio software has a plugin that can subtract background noise from a recording as long as you tell it what kind of noise you want to remove. That’s why it’s a great idea to record your “room sound” so you can subtract it later in editing. So after you press that record button, keep still and silent for 30 seconds, and then start your intro. 6. Each voice records on it’s own channel. Most skype recorders have this turned ON by default where each speaker guest his own audio track or channel. Whether you have an editor or you are going to edit it yourself, things are going to be so much easier with this setup. Not to mention it’s going to sound much better since you can easily process individual tracks and remove background noise from each separate channel. 7. Record with a different mic. Say you have a cheap mic hooked up on your computer but you have this nice handy recorder in your drawer that records better audio. Or your mobile phone picks up audio better than your cheap mic. You can record with that alongside your skype recording so you (or your editor) can just align those in your editing software, turn off the audio from the cheap mic and use the better sound from your other recorder. The same is true for your guest in skype. If it’s possible for him to record on a separate device and upload it to dropbox after. That way, you can choose which audio recording sounds better. Not to mention, if in case of connection dropouts in your call, you have a backup recording of the whole interview. 8. Pop Filter (or off center mic) The title of this post says that you don’t have to spend a dime. But pop filters are less than 10 bucks on amazon so maybe you can forgive me on this. If not, pop filters are basically old pantyhose wrapped around a wire or any round object. So you see, you can definitely make one without spending. Pop filters adds an amazing amount of improvement on your recordings by filtering out the plosives on words with letter “p” and “b”. It also makes an amazing way to create distance from your mouth and the mic (see number 3). If you really don’t want to shell out a few bucks for a pop filter, and you have issues speaking on an old pantyhose, the most you can do is to prevent yourself speaking directly towards the mic. Angle the mic so that you are speaking above it, not towards it. You have to experiment which angle picks the most sound without making your “p’s” and “b’s” pop. But seriously, pop filter. 9. Clap Loud (if you want to get your editor’s attention) If in case you made a mistake and you want to redo something, or you have an instruction to tell your editor mid recording, clap in front of the mic. Your editor will notice a spike in the waveform and that’s enough cue to make him check it out. Also useful when you are self-editing and you have some edit notes you want to tell yourself. 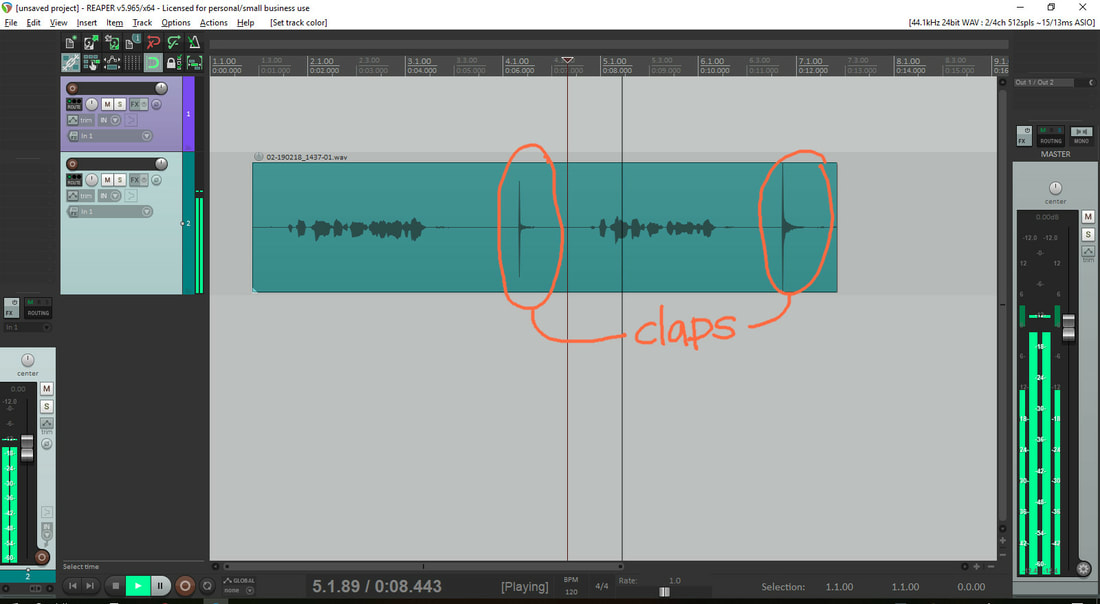 10. Leave the processing at the end (or to your editor) To keep things simple, don’t add any eq, compression, noise gate, or any processing while recording (specially when you don’t know how those work). Just focus on having great levels (see number 4) and then worry about processing at the end. I’ve done a number of projects where the clients went on to buy a hardware limiter or an exciter just because somebody in a forum suggested it. They then use it as live effects during the recording. And what I got is a loud distorted sound with boosted sibilance. I have clients who bought a mixer just because they thought it’s needed. But it only contributed a lot of noise in his signal chain. These are simple adjustment you can do in whatever recording setup you have. And this aren’t actually exclusive to podcasts. You can use some of this techniques in recording live instruments or for your youtube vlog. I was inspired to write this because I love working with good audio. And it pains me to hear a lot of low quality recordings that were done on great gears. And it specially hurts me to hear great stories that sounded like it was recorded inside an empty car park. But overall, I really hope all I’ve written will be of great help to those starting out with podcasting. Author's note: This article was originally posted at Medium.com, so if you have a Medium account you can read it there along with the comments and maybe follow me if you are interested in this kind of articles. Here's the link.
9 Comments
Great article! Awesome content. Loved this post and I’m definitely pinning it to share! You might like to visit Coupon plus deals for amazing coupons and promotion, especially for home, gadgets, and many more, with thousands of brands all over the world. Thanks for the great read and keep on posting. 3/30/2022 11:03:31 pm
I very much appreciate it. Thank you for this excellent article. Keep posting! 12/20/2022 08:29:17 pm
İnstagram takipçi satın almak istiyorsan tıkla. 1/8/2023 01:09:00 am
100 tl deneme bonusu veren siteleri öğrenmek istiyorsan tıkla. 6/30/2023 09:20:59 am
En iyi bayburt ilan sitesi burada. https://bayburt.escorthun.com/ Leave a Reply. |

AuthorMy name is Drew. I'm an audio engineer by trade. This is my portfolio and blog site. I write audio articles here and at Medium. You can check out my portfolio over here. Archives
April 2019
Categories |

 RSS Feed
