|
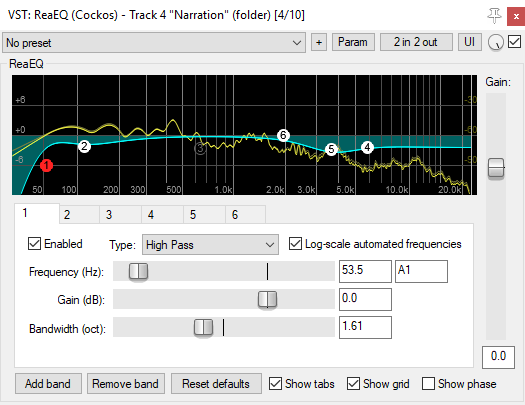
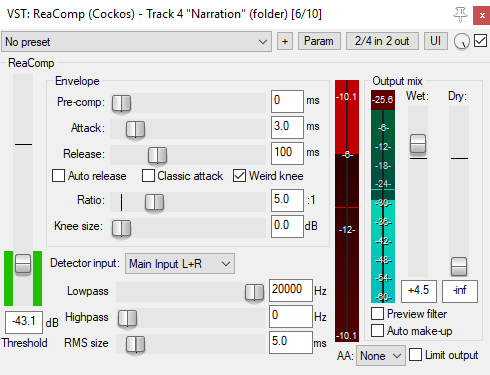
Author's note: This article was originally posted at Medium.com, so if you have a Medium account you can read it there along with the comments and maybe follow me if you are interested in this kind of articles. Here's the link. 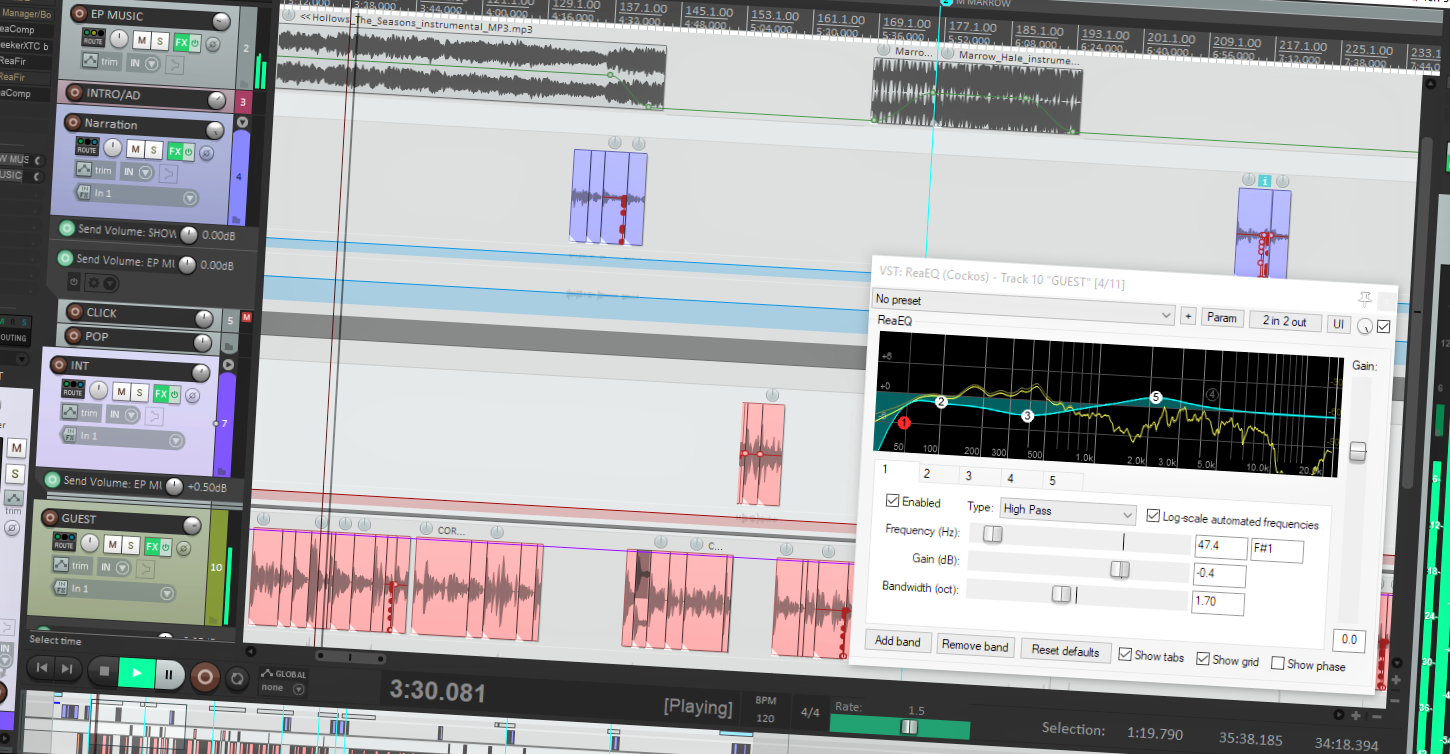 So you managed to get the best sound out of your simple podcasting setup by preparing well for your recording session. So what now? You fire up google and search for ‘how to edit and mix podcast’. What you get is a bunch of alien terms you have never heard before. Normalize, envelope automations, noise gate, transient designer. It can be overwhelming. I would have liked to tell you that those are just fancy words and everything is actually quite easy, but no, it takes some time and effort to learn mixing and audio engineering. I will however offer in this article the most accessible way for you to have a decent mix on your podcast episode. 1. Find a reference (A good final sound isn’t that far from the raw recording). In your podcast playlist, try to find what you think is the best sounding ones. If you think the audio engineer achieved that sound in the mixing stage, I can assure you he did not. A large chunk of reason why a recording sounds great is because people who engineered the session took a few minutes to ensure that they’ll get a great sound out of the recording session itself. So if there’s a podcast that you admire the sound quality or wish to sound like, download the an episode and insert it on your recording or editing software (on a separate track, adjust the levels so that the peaks are at around -16 dB). Mute that reference track and listen to it every now and then to serve as your reference during recording and editing. 2. Keep Headphones/Speakers Volume Low When looking at a painting, you try to look at it from a far enough distance so you could see the entire composition on canvas. It’s the same thing with mixing. The act of listening on low volume is akin to stepping away from the sound source so you can listen to it as a whole. From a far away distance, you can hear the differences in volume of individual tracks, you can listen if your voice is shining through the background music. Not to mention it keeps your ears healthy. Feel free to check your work at a normal listening levels every now and then for a few seconds, but for the rest of the editing time, keep it low. 3. Processing: EQ and Compression There are hundreds of processing plugins out there and each one can take some time to learn. Save yourself the headache and just focus on learning EQ and Compression. Those two are the staples of audio engineers in their effects chain, the rest are just icing on their cake. EQ and Compression makes the biggest improvement on your audio and you don’t even have to pay for it. It’s included in most audio editing software (even the free ones). I wrote a separate article on EQ and Compression just to separate the very technical stuff from this article.
4. Should I Normalize? I am surprised to see normalization being discussed among people starting to get into podcast recording. The basic premise of normalization is that you raise the volume of your recorded volume so that the peaks are at a ‘normal’ levels (usually 0 dB to maximize loudness), and with it, the noise as well. If you recorded your episode with a proper headroom (peaks at around -16bds), you don’t really need normalization. In fact, even if you made a mistake and recorded your peaks way too low (or way too high), you don’t really need to use normalization because you can just turn the pre-fx gain knob on your software, or add a gain plugin on that track so that your peaks ride around -16 dB. Normalization robs you of that control. But to make things simple (and sound nicer) always aim for good levels during the recording. 5. Edit Once you’re done adding EQ and Compression to your tracks, then you can start editing. Editing is probably the easiest part in all this but it is very tedious. Editing a recording can take around triple the time of the length of your audio, depending on your taste. I have worked with clients who wants every ‘uhm’ and ‘ahh’ out of the show, and I also have worked with others who wants keep some of those just to make if feel more natural. The ‘silences’ itself is another decision to make in editing. Being ruthless with trimming ‘silences’ can make the show lively and upbeat, but can also make it sound hurried. While long silences can let your show breathe and relax, it can also result in your audience getting bored and annoyed at the pace. So you always have to find the most suitable middle compromise with your editing. Easiest way: listen to your reference episode again, how much ‘uhms’ they have and how long the pauses are? Pro Tip Number 1: Assign a single key shortcut to the ‘cut’ and/or ‘slice’ command. You are going to be using those a lot so using ‘ctrl+x’ can really tire your fingers. Mine is ‘x’ for cut and ‘s’ for slice. 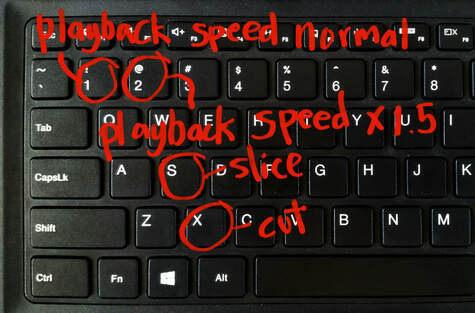 I keep most of the editing shortcuts together near my left hand Pro Tip Number 2: Speed up your editing by changing the playrate speed (speed up or slow down the playing of your audio) of your software. Most DAW (Digital Audio Workstation) software has setting for playrate while maintaining the pitch of the sound. I edit with a playrate of 1.5x and assign keyboard shortcuts to go back and forth 1x (normal playrate) and 1.5x (sped-up playrate). 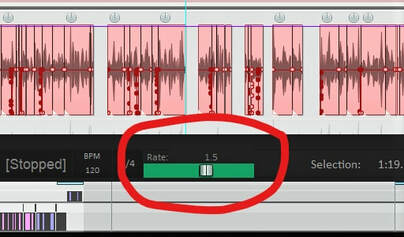 6. Mix Background Music in Mono Maybe it’s for your intro or for your sponsor spot, mixing in some background music under your vocal track is something that is very easy to mess up. Even pros with a tired ear can totally wreck a show with a loud music drowning out the podcast host. So my tip is to just keep it low. How low you ask? Here’s a technique: on your audio software slide your music volume fader down so that all you hear is your recorded voice. Turn on the Mono button on your software editor. Then very slowly drag the music volume fader up until you can just hear the beat of your music. Listen very carefully to the snare drum of your music (if there is snare). If you start to hear it, then you should be very careful in adding more volume. When you are OK with the overall mix, switch everything back to stereo. The reason for mixing in mono is simple, when it sounds good in mono, it sounds good on stereo, not the other way around. Plus, some people listens to single speaker devices like a bluetooth speaker or their phone speaker. Another thing, it’s very important that you use the fader here instead of the knob on your audio software because faders have so much more control when it comes to adjusting the volume. 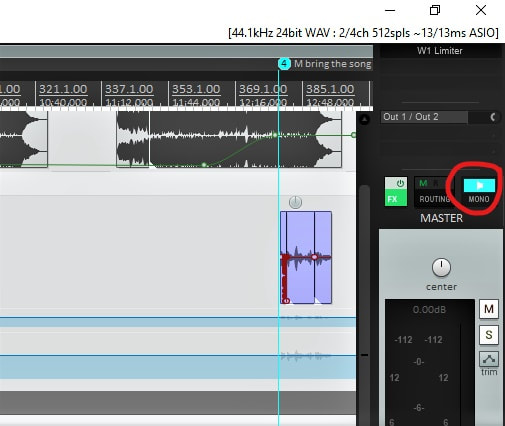 Mono button is usually at the master fader 7. Then, We Lift the Volume Up
You’ll probably notice by now that your episode loudness is still way below the standard loudness of uploaded podcasts online. Once you are done EQing, compressing, editing, and mixing in your background music, it’s time to finally set the final loudness of your show. This is another part where I notice people use normalization. Again, we don’t need to do that. Instead we are going to use a limiter on the master fader to lift the overall volume up and prevent peaks going to and above 0 dB (remember 0 dB and above is distortion). So you’re probably thinking, ‘Ugh! Another plugin to learn’. But if you’ve learned how to use a compressor (number 4), you already know how to use a limiter because a limiter is basically a compressor with a very high ratio. Again, I wrote an article on compression and in it is a discussion on limiters. 8. Check You are almost done. Unmute the reference podcast you inserted in your editing software and then listen back to your own mix. It’s not exactly on equal quality but you feel you are going there. And that’s alright, that’s the point of having a quality reference to strive for. You can’t match a professional mix now but you know where to go. Last thing to do is to render your final mix as if you are going to upload it (usually 128kbps MP3 stereo), then start listening to it the usual way people would listen to podcast, inside a running car, on your earphones while on a treadmill, or on a bluetooth speaker in your house. Then listen in to your reference podcast again on the same speaker. Take note of things you can adjust for this episode and take note as well of the things you want to achieve for the next episode. I wrote this because I noticed a lot of people doing unnecessary things on their mix that does not really add huge quality in their sound. You won’t get an NPR sound with these but it can be a good foundation to build upon a great sounding show.
0 Comments
Leave a Reply. |

AuthorMy name is Drew. I'm an audio engineer by trade. This is my portfolio and blog site. I write audio articles here and at Medium. You can check out my portfolio over here. Archives
April 2019
Categories |

 RSS Feed
